Thursday, December 12, 2019

Stocking Stuffers

 Stocking Stuffers

If you need some stocking stuffers for your budding scientist here are some items I found at dollar stores that are very useful for any ones lab.


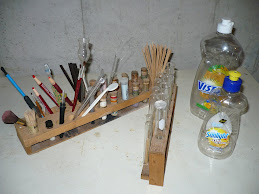
Holder for my stains


In this picture you will see I found some plastic dropper bottles, which can be used to hold microscope stains or chemical solutions for experiments and storage. These bottles fit nicely into the lipstick holder I found there as well. It perfectly holds 12 of these dropper bottles in nice neat rows. The top row is larger and does not separate the bottles. I hold alcohol swabs (another stocking stuffer) in the top row.
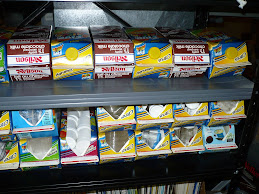
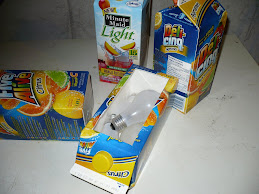


Dollar store finds


In this picture there is a q-tip holder and q-tips. I use these for alcohol and acetone applicators. The 2 bottles have a push top that allows for the pumping out of alcohol and/or acetone. Cotton balls and a container to hold them. Cotton swabs, smaller plastic jars that can hold chemicals and specimens in.

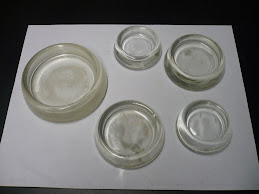
I have also found medicine droppers, food colouring, etc. As can be seen here there are many inexpensive items that can be used in the lab, that are inexpensive enough for stocking stuffers.

Friday, November 8, 2019

Spectrometer

fig. 1 Public Lab Spectrometer 3.0


fig. 2 Inside of Public Lab Spectrometer
fig. 3 Spectrometer I am Putting Together

Spectrometer

I am trying to build a spectrometer. The first figure you see of the spectrometer that was purchased from Public Lab by friend that he has let me use. It works well uses a DVD for a diffraction grading. The biggest concern with this product is the camera inside is always coming loose (fig 2) and there is no place to put the sample that you are testing. Need to make a sample holder.

https://publiclab.org/wiki/desktop-spectrometry-kit-3-0

In the third figure (fig 3) you see I am using many of the holders from my optical bench except I picked up a magnetic white board to hold these holders. It is larger and being white I can see measurements on the red ruler much easier.

I 3D printed a slit and a sample(cuvette) holder and used my own diffraction grading that I purchased from Amazon. For the camera I am trying a PS3 camera that I found for $3. For the software I am using Theremino spectrometer. There website has plenty of information about spectrometers.

https://www.theremino.com/wp-content/uploads/files/Theremino_Spectrometer_Construction_ENG.pdf
 
I will be continuing the spectrometer build using different web cams and enclosures. I will keep posting as I build it.

Wednesday, October 2, 2019

A Simple Optical Bench

A Simple Optical Bench

All the parts for holding lens and filters

Testing the different parts


With a metal cookie tin, first surface mirror, clear CD holder(beam splitter), laser pointer or other light source (LED), magnetic tape strips and 3D printed holders I am able to put together a very simple optical bench.

The first surface mirror which I found at a surplus store is made into smaller pieces. If you can't find a first surface mirror an old hard drive plater will work fine. A first surface mirror has mirroring on the front glass surface and not on the back side of the glass such as most mirrors.

I am lucking that I have access to a 3D printer. It is one of the best tools for making things you want to build with out having a metal or wood working shop.

I 3D printed holders for defraction grading film, polarized film, laser pointer or LED light source, light slit, mirrors, beam splitter, camera, etc. I use magnetic tape strips and mount them on the bottom of the holders so they hold on to the flat metal surface of the cookie tin. I super glue the magnetic strips to the 3D printed object. I am finding the tape strip is not holding very well to the plastic.

If you don't have access to a 3D printer you can use metal "L" brackets or Lego parts or even plastic that has 90 degree angles to make your holders. Even flat plastic can be bent using a hair dryer to shape the holders.

I built this because I am going to try and make a spectrometer. I will talk about this later.

Tuesday, September 3, 2019

DIY Digital Microscope


Camera Placement

First Adaption
  
 
DIY Digital Microscope

Staying with microscopes, I have to build my own digital one. I want one with viewing from underneath.

Using a Dollar store $3 webcam, a piece of plywood, 3 4 inch bolts, 5 washers, 6 nuts, 4 wingnuts and 2 small pieces of 1/4 inch plastic. The only item I purchased was the webcam. Everything else I had laying around. This was just a quick work around I put together to see if it is worth while making.

I wanted to microscopically look at live samples from underneath. It actually works better than I thought it would. It looks to give about 4x the magnification, you are definitely not going to see bacteria. Though, I might be able to see other micro-organisms, I will further test this. As of yet this is not a final build, I will be making many improvements to this setup, especially with the magnification. I would like to at least get to 100x magnification. I just wanted to see if this would be worth while pursuing. And yes it is. And for a very low cost.

In this setup I have the camera is fixed and the sample is moving up and down.

Inspiration for this build came from here, they use a smartphone and laser pointer optics:
https://www.instructables.com/id/10-Smartphone-to-digital-microscope-conversion/

Here is another link using cardboard for the build:
https://www.youtube.com/watch?v=cHcX0vx4FZM

There also is the FlyPi that uses the Raspberry Pi system and camera:
https://open-labware.net/projects/flypi/

I will be looking further into the this version and the FlyPi.

Friday, August 2, 2019


Common Microscopy Stains


Stains found in common stores

I found a few different stains for microscopy at Walmart and a pet store.

At the pet store I found:
Methylene Blue - which is 2.3% and you should at least dilute to be at least 1%. I like to use it at 0.1%. It can also be used for DNA staining.

Malachite Green - is 0.038% therefore I use it as is.

At Walmart as well as many pharmacies I found:
Gentian Violet - is 1% I use as is. This is used as a replacement for crystal violet.

Iodine(tincture) - is 5%, I use it at 1%. Some iodines come as 2%.

India Ink - I use as is.

Another stain you might want is Eosin, many red inks use eosin for the dye, as well as some red food colouring. I am trying different inks, if I find a certain brand containing eosin or one I like I will post it. Trying and experimenting with different products you might find one you like as well.

As you can see there are many stains easily available to you without having to go to a specialty shop for them. Remember to always look at the ingredients of different products, you may find a chemical you need or want.

Sunday, July 7, 2019

Web Cam On Old Microscope


Webcam Mounted on Microscope

Parts for Camera Mount

Camera Image

I have an old microscope and I find I can't look through it for long periods of time anymore so I decided to add a webcam to it. As you can see it is mounted on top of the ocular lens (Top Image) giving me the full magnification of the microscope.

It was a very simple build requiring very little to do or obtain (Middle Image). I was lucky that the camera was the same width as the lens. At first I was thinking of 3D printing the camera holder but I had a small plastic container I had picked up from the dollar store. Once the lid was removed and the bottom sawed off, both the camera and microscope lens fit right in. This allowed me to place the camera right on top of the lens.

I use Linux for my system so I am using the program cheese to view and record my samples (Bottom Image).