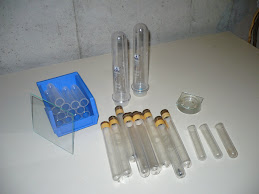
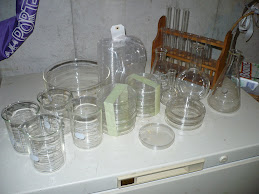
Sunday, November 8, 2020

Another Science Kit

Science Kit

I found this kit at a second-hand store.

Magnetism Kit


"Magnetics Science Kit" - The science of magnets and ferrofluid. This second kit I also found for $10 at a second-hand store. I have wanted to start to look at ferrofluids and when I found this I figured this would be good way to start.


It comes with:
1 bottle of ferrofluid
iron filings
15 magnets
steel balls
copper tube
PVC track
Experiment guide
Etc.

I will more than likely still produce my own ferrofluids (you can find this online) but this gives me a start.

Finding kits at reduced or discounted prices (look after Christmas) and or used kits at second hand shops you are still able to get started in many different sciences and build your own lab.

Science Kit

Science Kit

I came across this kit, one at a department store.

Kit 1

The first kit "Charge" - This was on a clearance sale for $10 from $34.95. It was new in package. Taking a look at it and finding out it had the parts to build your own Van de Graaff generator, I figured I would like to build one so why not try it.

Van de Graaff Generator

It's manual is very basic but a good start. From common items they show you how to build a Leyden Jar, Electroscope, electrostatic motor, Franklin Bell and of course the Van de Graaff generator. There are many youtube videos showing you how to build these items but for only $10 I get many of the pieces to build the generator.

I have been wanting to begin to experiment with high voltages and with this kit I should be able to start.


Sunday, October 4, 2020

Book: Zero to Genetic Engineering Hero:

Zero to Genetic Engineering Hero: The Beginner's Guide To Programming Bacteria At Home, School and In the Makerspace.

By Justin Pahara and Julie Legault.


This is a newer book. As well as discussing older books I will be looking at newer books to. I just received this book from Amazon. It is a very interesting book. As the title states it takes you from beginning basics to the understanding of bio-engineering. There are at least 9 lab exercises to do. From DNA extraction to manually turning on genes.

It has a section called "Setting up your Genetic Engineering Hero Space". Covers bio-safety and governmental regulations. The book has sections giving you the background information of what is happening and why.

Other than the first exercise, DNA extraction, the other exercises require different kits from the supplier of the book. This can get costly but each kit can be purchased separately, which may help in keeping the costs down. It seems the kits have everything you need to do the experiments easily. The hardware is extra - incubator, water bath, etc.

It also requires a lab hardware kit, called, "The DNA Playground Minilab". It incubates, cools and heat shocks the material. This can be costly. But if you follow this blog most of the hardware needed you can build yourself.  

I will see if I can get some of the lab exercise kits and try them out. I will discuss this in a later post.

Saturday, September 12, 2020

Laser Projector Microscope

Equipment needed:

Laser pointer(green 532 nm) or red, Syringe(10ml), screen or wall, apparatus to hold laser and syringe in place, sample(from my aquarium).

Green Laser Pointer

 
In the diagram above you can see how the microscope is set up. The laser beam runs through the specimen droplet that is formed below the syringe. This produces an image on a screen on the other side of the droplet.
 
 
Image on Screen


Moving the laser closer and further away will bring the object in focus. Even if not completely clear or bright you can see the organisms swimming around. You can make out some detail to try and identify the organism.


Beam on Droplet


After reading some more on the laser microscope I found that the drop of water acts as a small spherical lens which magnifies the image. I tried the red laser pointer but the image was not as bright. I will look further into this in the future.

Tuesday, July 14, 2020

Books New and Old - Build It Yourself Science Laboratory

Written by Raymond E. Barrett.

Written in 1963

This is one book that I found at my library when I was younger. It was one of a handful of books that taught me science. I would take it out as much as I was allowed to. I read and reread it over and over again. I created many of the projects and did many of the experiments that you find in the question sections.

I was already building my lab from what ever I could find and re-purpose for use at home. So I was so excited when I found this book. I believe I really wore out this book. It was still on the library shelves until around 8 or so years ago. One day I went to find it and it was no longer there. I did end up finding a used copy later on so I purchased it for my own library.

It is broken up into 3 sections: Chemistry, Physics and Biology. Physics was broken up into 6 other sections: Astronomy and Light, Atomic Energy, Electricity and Magnetism, Forces, Measurement and Motion, Geology and Meteorology.


Written 2015

The book has been re-edited and reprinted "the annotated Build-It-Yourself Science Laboratory" and now brings it up to date. Some things that are used in the original book are not legal or are dangerous or can not be found any longer. This new book helps to make it more useful for today's scientist.

Projects include:
Cloud Chamber
Vacuum pump
Microscope
Barometer
Radiometer
Microtome
Etc.

Over 100 pieces of equipment and 100's of projects. This book is a great way to learn to look at items and see other uses for them.

Monday, May 25, 2020

Spectrometer Version 3 Continued


Figure 1


I have been continuing the build for version 3 which holds the sample inside the container. In figure 1 you see the 3D printed sample holder, here I have a test tube but it does hold cuvettes as well. Next to the holder on the right you can see an LED. This one is a bright white LED. I intend to use a RGB LED so I can choice different colours or wavelengths. It will also be removable so I can use IR and UV LEDs.

Figure 2

Figure 3

In figure 2, I use a 3D printed slit holder and then mount 2 single edge razor blades which are adjustable. With the other 3D printed parts I hold the slit mechanism in place within the spectrometer. This allows for removal of the slit so it can be adjusted. In Figure 3 you can see the unit put together.

Figure 4
And in figure 4 you see allthe components put together with the sample and slit holder, LED source, diffraction grading and web cam all in one box.

This is all put together in a wooden box I found at a dollar store. I still intend to make this smaller so I can easily carry with me. I do have access to a 3D printer so it was easier for me to print the parts I needed. But all the parts could be very easily cut from foamboard.


Wednesday, May 13, 2020

Spectrometer Version 2 and 3


I have continued working on my spectrometer. I focused on 2 types, one that places the sample on the outside the spectrometer between the light source and the slit. The other where the sample is placed within the housing in a sample holder.


Version 2 Image 1

Here in the first version (image 1) you can see the camera and the diffraction grating are mounted on the right side at a 30 degree angle. Both camera mount and grading are 3D printed but can easily be made by using metal or plastic 'L' brackets.


Image 2


In this image (image 2) you can see how I mount 2 single sided razors to create my slit for the light to go through to the diffraction grating and then to camera. The razors have a very sharp edge and I am able to make very fine slits for the light to pass through. There is a small notch in the razors that the screws go through that allows for adjustment of the blades to increase and decrease the width of the slit.

Image 3 Version 3


In this 3rd image I am still working on this spectrometer. There is a camera holder with a 30 degree angle positioning, next going to the right is going to be a grading holder (the hole has been drilled to hold it in place). From there we go to the slit and then the sample holder. All these I have 3D printed. On the right side of the box you can see the hole drilled out to mount my LED light. I intend to use different light sources that have - white LED, RGB LED for different colours, UV LED, IR LED and different lasers, red and green for now.

Both cases are painted black on the inside. All 3D printed parts were printed in black PLA. I am using the Theremino spectrometer software.

I am also looking at building a nano-drop spectrometer more on that later.

Tuesday, May 5, 2020

Books to Read


3 Great Books to Read

Books To Read

The Amateur Scientist, Procedures in Experimental Physics and Pictorial Handbook of Technical Devices

I love to read and I love to read scientific and tech books. Here are 3 that I had or received as gifts.

The Amateur Scientist - is one I had when I was much younger. As you can see it is quite worn. I have read this book cover to cover countless times. I have done many of the experiments in this book. This book is more of a how to do of experiments written in 1960 and is named for the column that the experiments are derived from - Scientific American's The Amateur Scientist monthly column, which ran for many years or decades really.

There are experiments in astronomy, physics, nuclear physics, rocketry, geology, math, biology, optics, etc. It is so full of different experiments it is amazing. Many of the experiments are dangerous and maybe hard to do as many items have become very hard to find. It is a great read even if you can't do the experiments. It does show what individuals can do and accomplish on their own. You maybe able to find this book as a pdf file on line.

The next 2 books were given to me as gifts over the last few years. Both as well are older than most.

Procedures in Experimental Physics - was written in 1938 and it covers many procedures needed in a laboratory, such as, glass blowing, optical work, vacuums, surface coating, electronics, old time photography, etc. Another great read in how build and use science equipment. A bit out-dated but a great read.

Pictorial Handbook of Technical Devices - written in 1971, this book shows you pictures of many many devices so you can have an understanding of how they are put together and how they work. There are joints, springs, levers, belt drives, prisms and lenses, etc. It is full of devices.

These books are out of print but you may be able to find them online. Even though they are older books they allow me to see how things can work and helps me come up with new ideas for my own experiments. I will be discussing more books in the near future. I may even start a book of the month column. In the mean time, old or new keep reading anything that interests you.

Sunday, January 19, 2020


Digital Microscope Version 2

This microscope views the specimen from below. Here I use parts from an old CD-Rom drive, a web cam, block of wood to hold it together, laser pointer lens, some foam board and glue.


Fig. 1


Taking apart the CD-ROM (fig 1) I keep the carriage that moves laser LED along the CD. This allows the specimen stage to move up and down to focus it. The gears on the side are used for the focusing, the bottom gear is used for regular focus and the top gear is used for fine focusing. I manually move the gears. I may look into using the gear motor to electrically move the stage.


Fig. 2


I mount the carriage on a thick piece of wood (fig 2) to allow stage movement and support.


Fig. 3


The specimen mount (fig 2, right of image), is made from foam board. and (fig 3) then mounted on the carriage with Gorilla glue.


Fig. 4


Fig. 5


Fig 4 and 5 show the whole thing put together. You can see the stage is up and then is lowered to focus the image.

To raise the magnification of the camera I used the lens in a cheap laser pointer and mounting it  on the lens of the camera. This does give higher magnification, about 100-150x but is not as powerful as a compound microscope which can get to 800-1000x. I found that when using live mounts, living organisms many times it is best to view them from underneath.

All the parts I had were just laying around which made this a very inexpensive build. I am sure that it is easy to find a junked or used CD-Rom or DVD. The camera is just a cheap webcam again something you might be able to find from a friend or thrift shop. Mine was a dollar store purchase for $3. I find that this microscope does work better than my first version, especially with the focusing.